
.png)




Follow the steps below to schedule phishing campaigns that use system-recommended lures. The campaigns you create will automatically send simulated phishing emails of different complexities to the users you select. A lure is sent to each active user at a random time once every two week period for the duration of the campaign.
Note: Security awareness training for any users who click on a lure is automatically enabled when you create a phishing campaign. This means that users who click on a lure will receive an email notifying them that they've been assigned training. They'll receive a link to one of several training modules, such as Email Security or Data Protection.
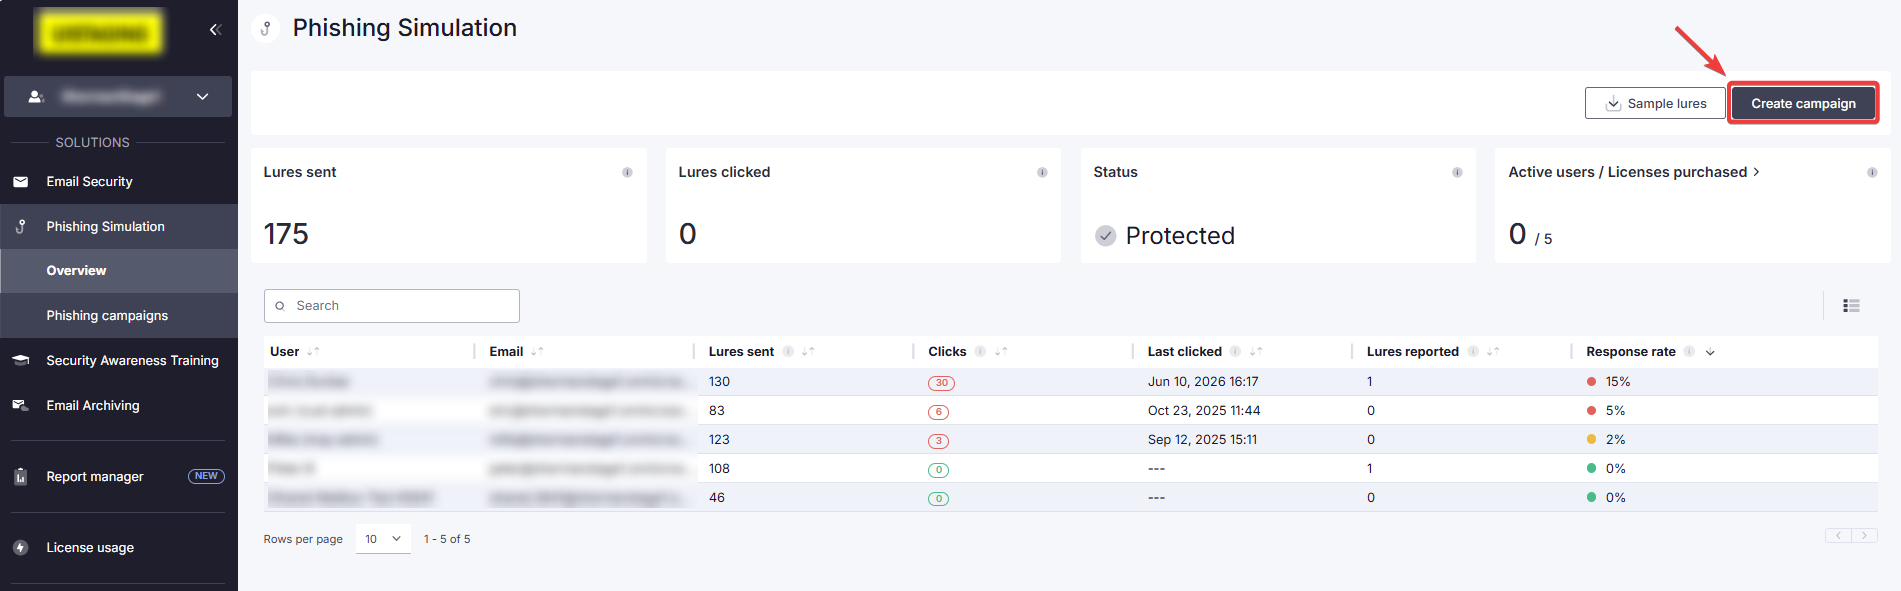
1. You can create a phishing campaign by going to Phishing Simulation > Overview or Phishing Simulation > Phishing campaigns. Click Create campaign at the top right.
2. Enter the following details:
Campaign name: The name of your phishing campaign (maximum 30 characters).
Campaign duration: The length of time you want your campaign to run.
Start date: Date on which your phishing campaign begins sending lures.
- End date: The end date is automatically prepopulated based on the campaign duration you selected. If you selected a continuous campaign, the end date is not applicable.
- Description (optional): A short summary of the campaign.
Stealth mode: When you enable stealth mode, users won't know that they've been enrolled in an active phishing campaign. If they click on a lure, they won't be notified and they won't receive reactive training.
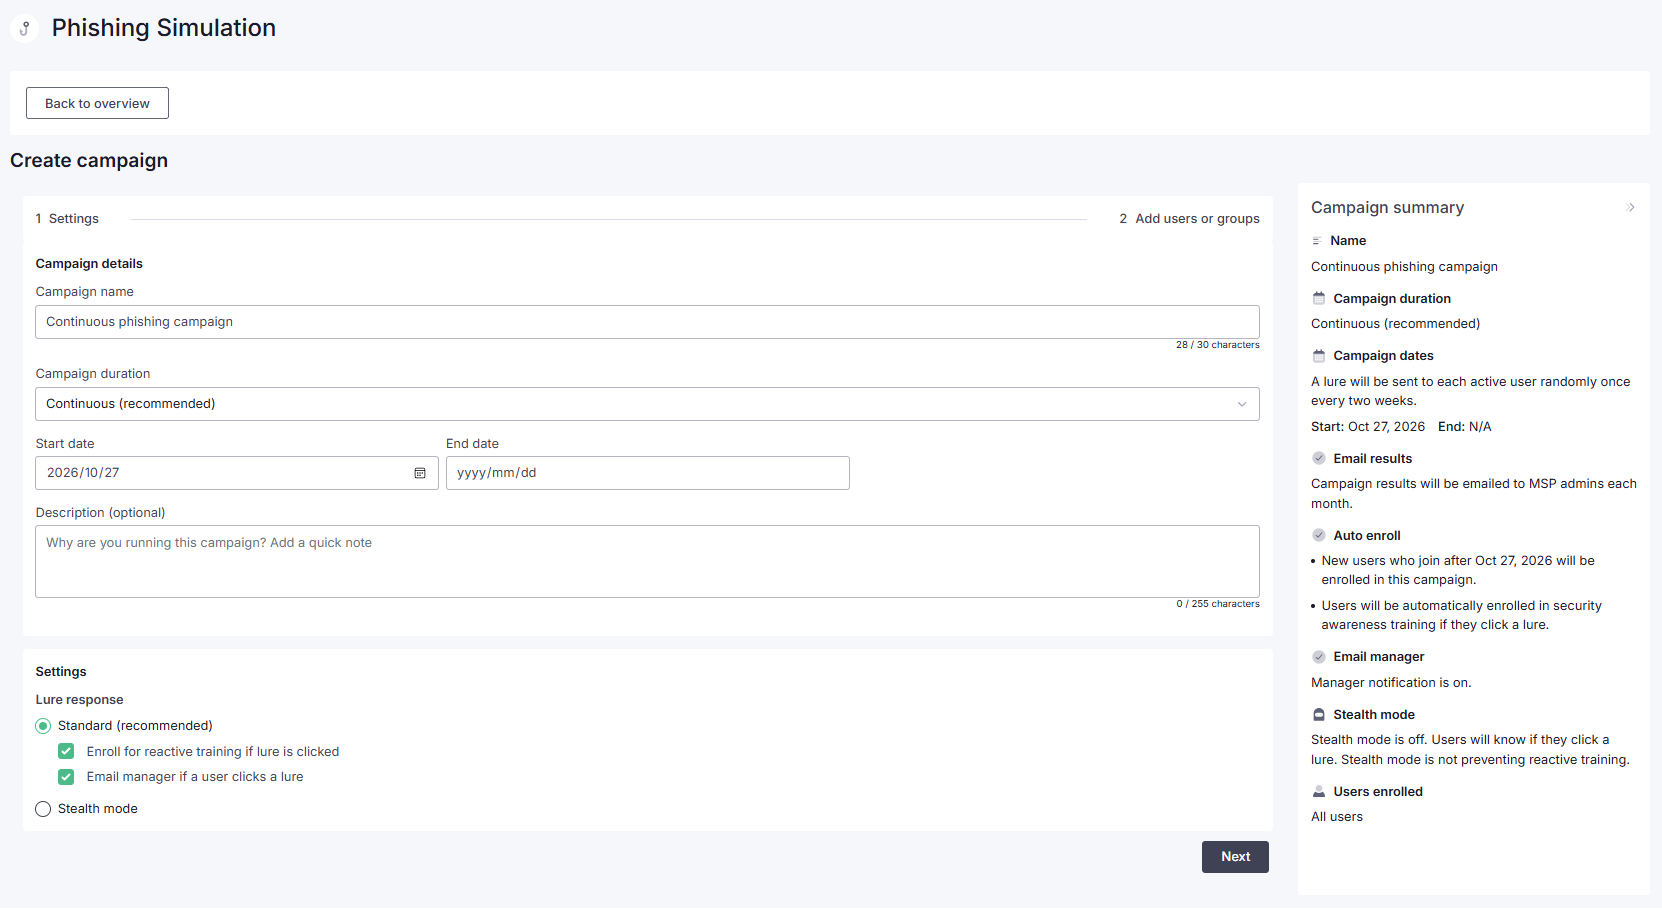
As you fill in the fields, a Campaign summary panel on the right updates automatically. When you're ready, click Next.
3. Select the users or groups you want to enroll in the phishing campaign. As you select users/groups, the Campaign summary panel on the right updates automatically.
Note: If you don't see the Groups tab immediately, wait up to 15 minutes for synchronization between Microsoft 365 and the Platform to complete.
If you're selecting users:
The default selection is All users.
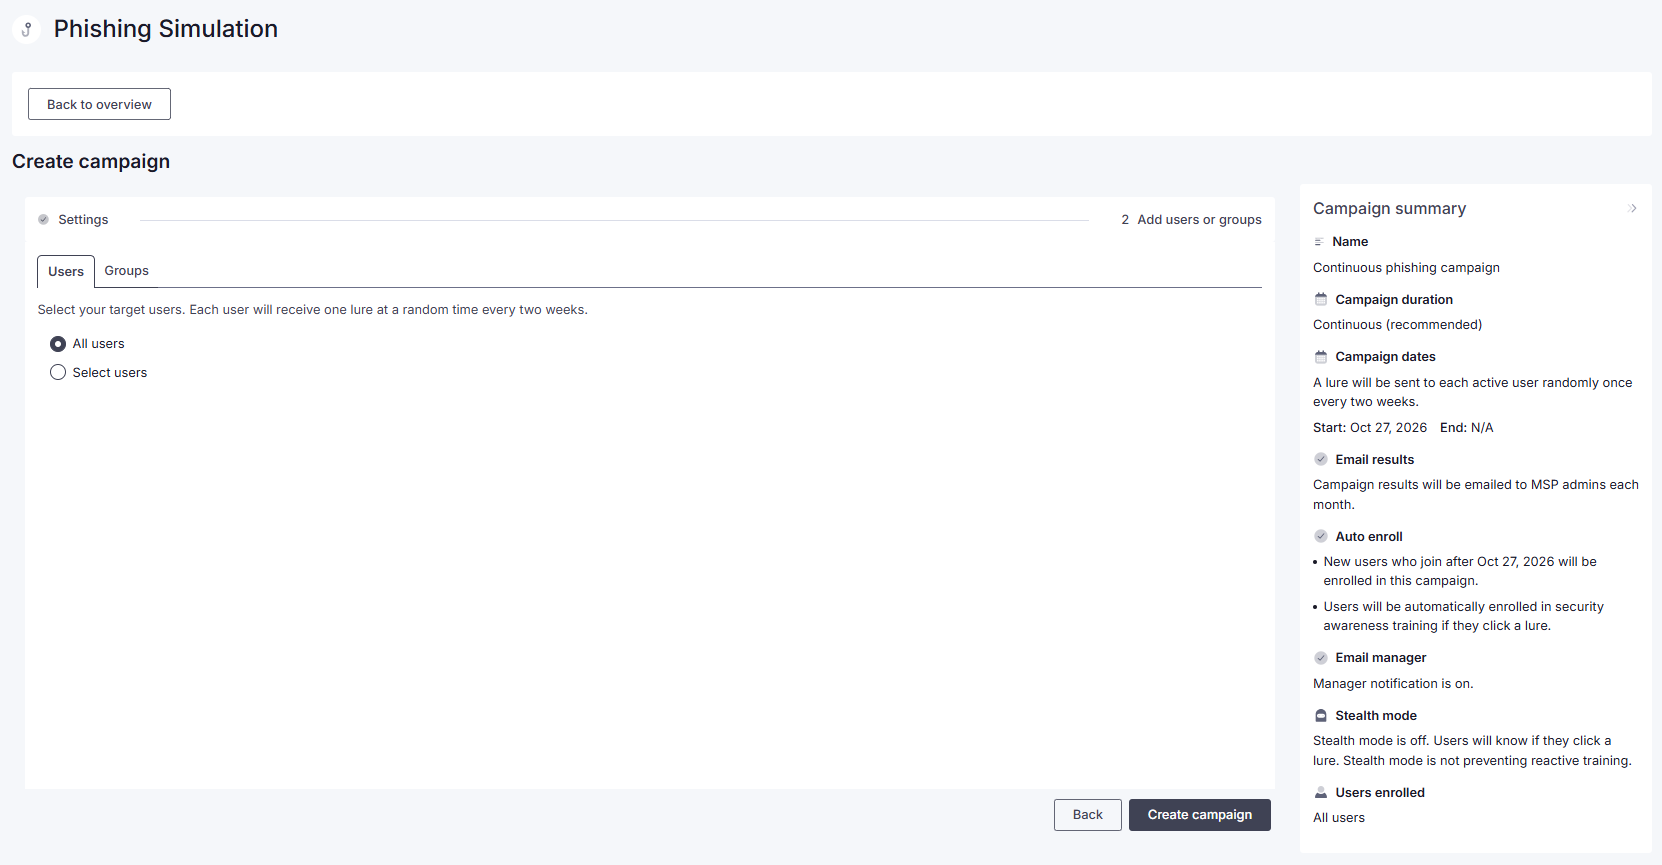
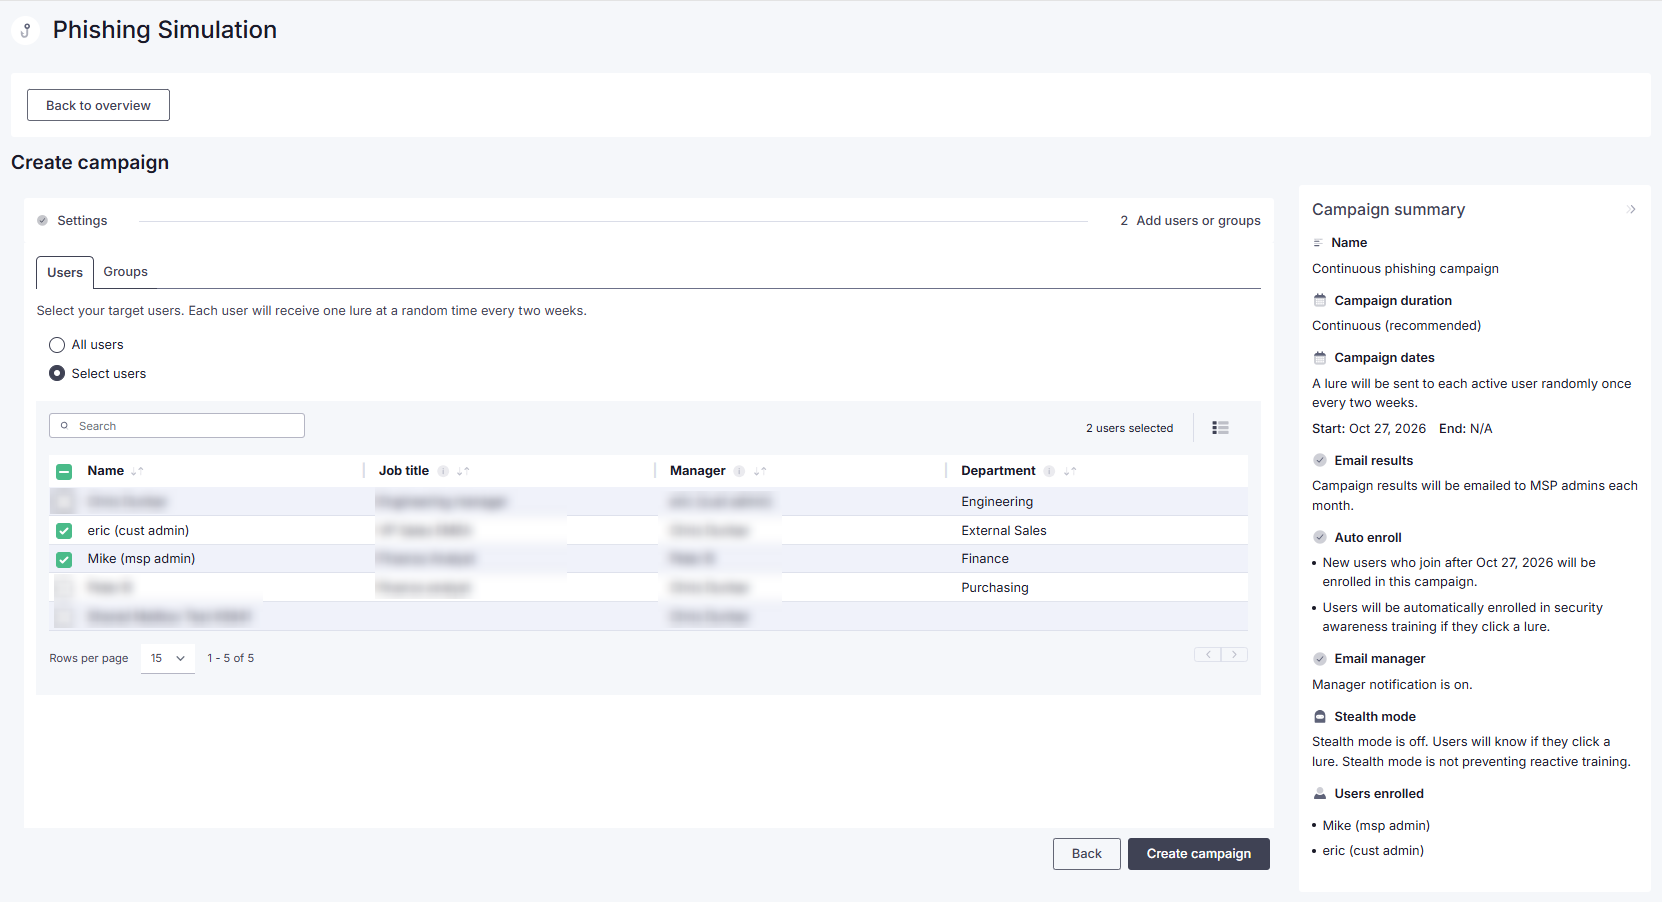
If you want to select specific users, choose Select users, and check the applicable users in the provided list.
If you're selecting groups:
Click on the Groups tab. The default selection is All groups.
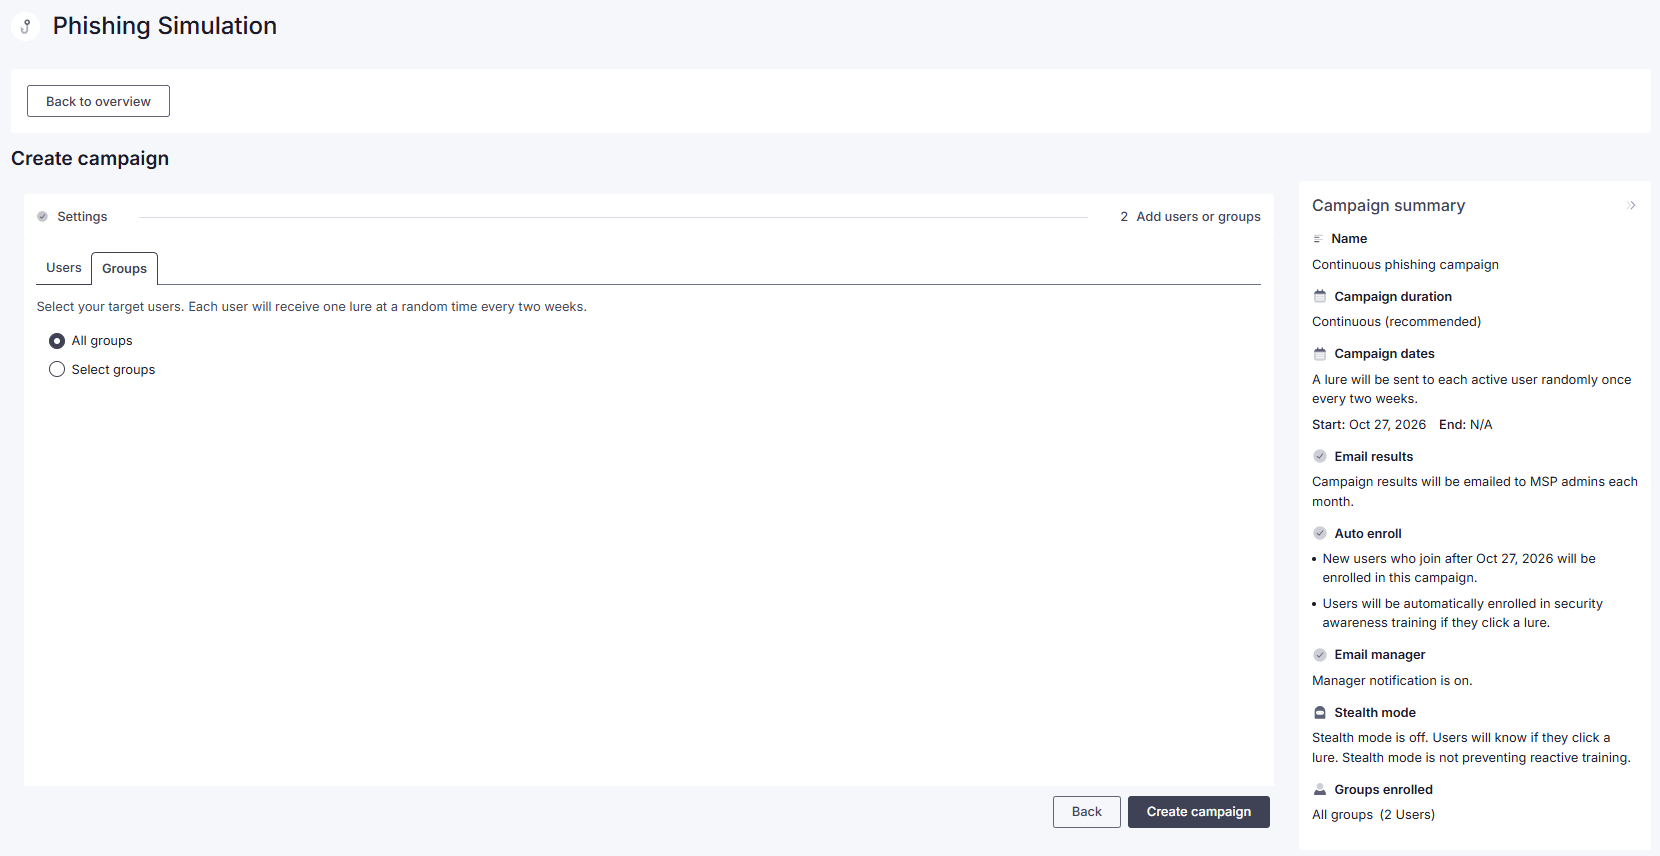
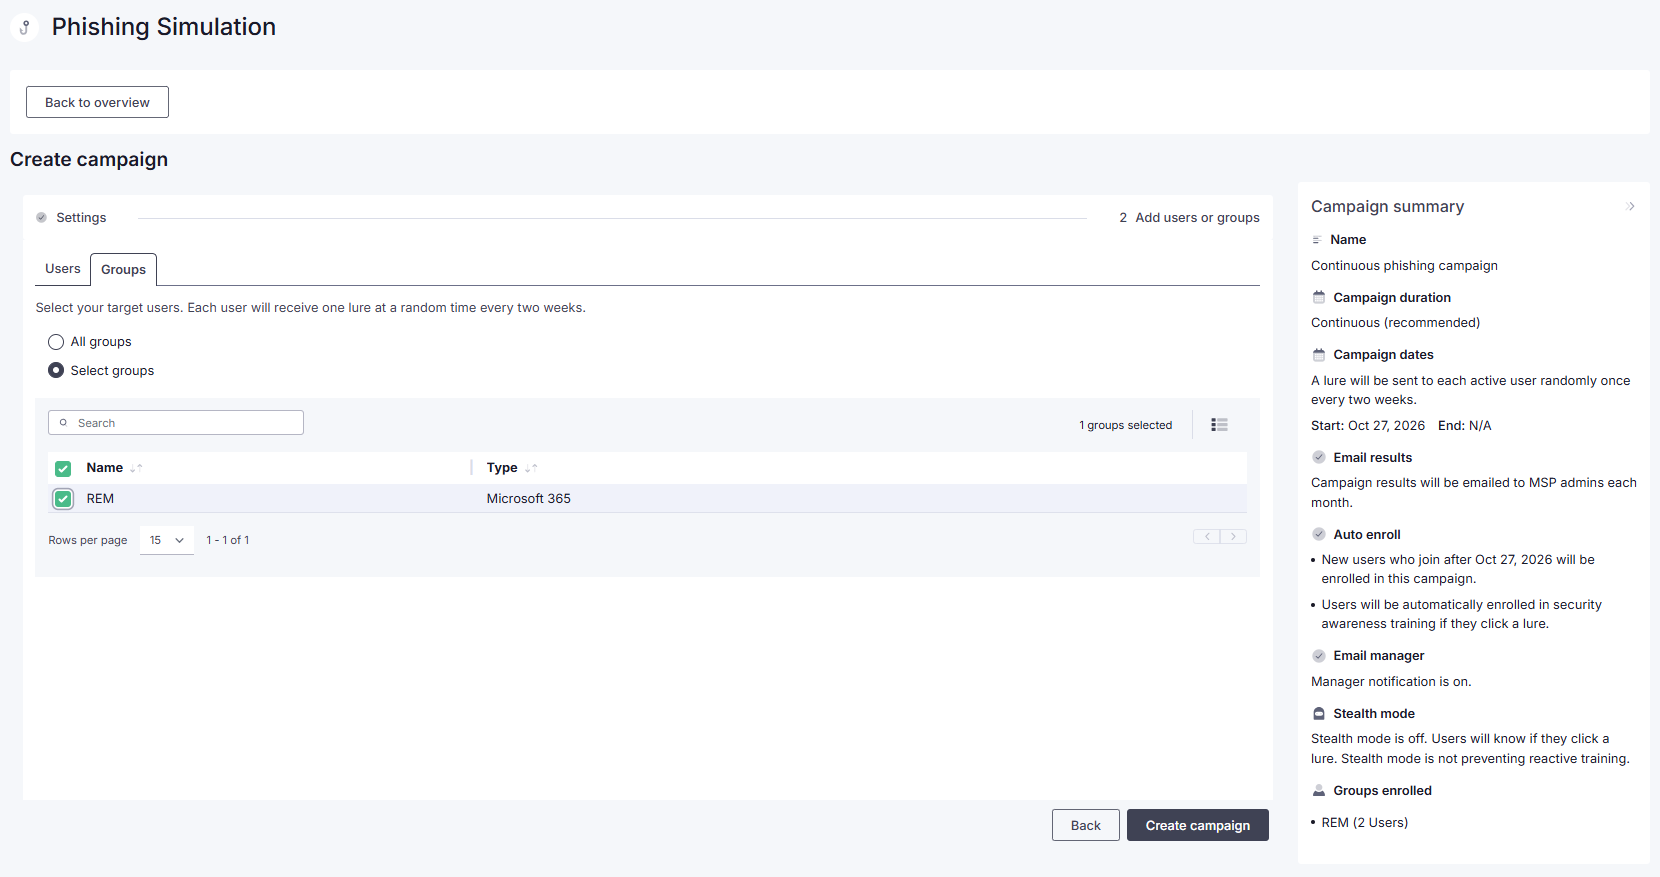
If you want to select specific groups, choose Select groups, and check the applicable groups in the provided list.
Note:
- When your tenant is first connected to the Platform, our system takes up to 15 minutes to synchronize between Microsoft 365 and the Platform to populate the user/group list. If the initial attempt is unsuccessful, the sync is retried every 15 minutes until the list is populated.
- Subsequent updates to the user/group list on Microsoft's side take approximately 24 hours to sync to the Platform. Our system checks every 15 minutes when the list was last synchronized with Microsoft 365, and updates the list if the last sync was more than 24 hours before.
- If you select a group, you are also including all subgroups and their users.
- If a user is not in any groups, they won't be included in the campaign if you select All groups.
- Hidden membership groups are not supported.
- When you select groups, you will also see the total number of enrolled users under Groups enrolled in the campaign summary on the right. However, this number is not deduplicated across groups, i.e. the number will be higher than the number of unique users.
- Auto enrollment applies, so all new users added to the selected groups in Microsoft 365 will be enrolled in the campaign. If a user is removed from a selected group in Microsoft 365, they remain enrolled. Users are only removed from the campaign if they are removed from the Microsoft 365 tenant.
5. Click Create campaign.
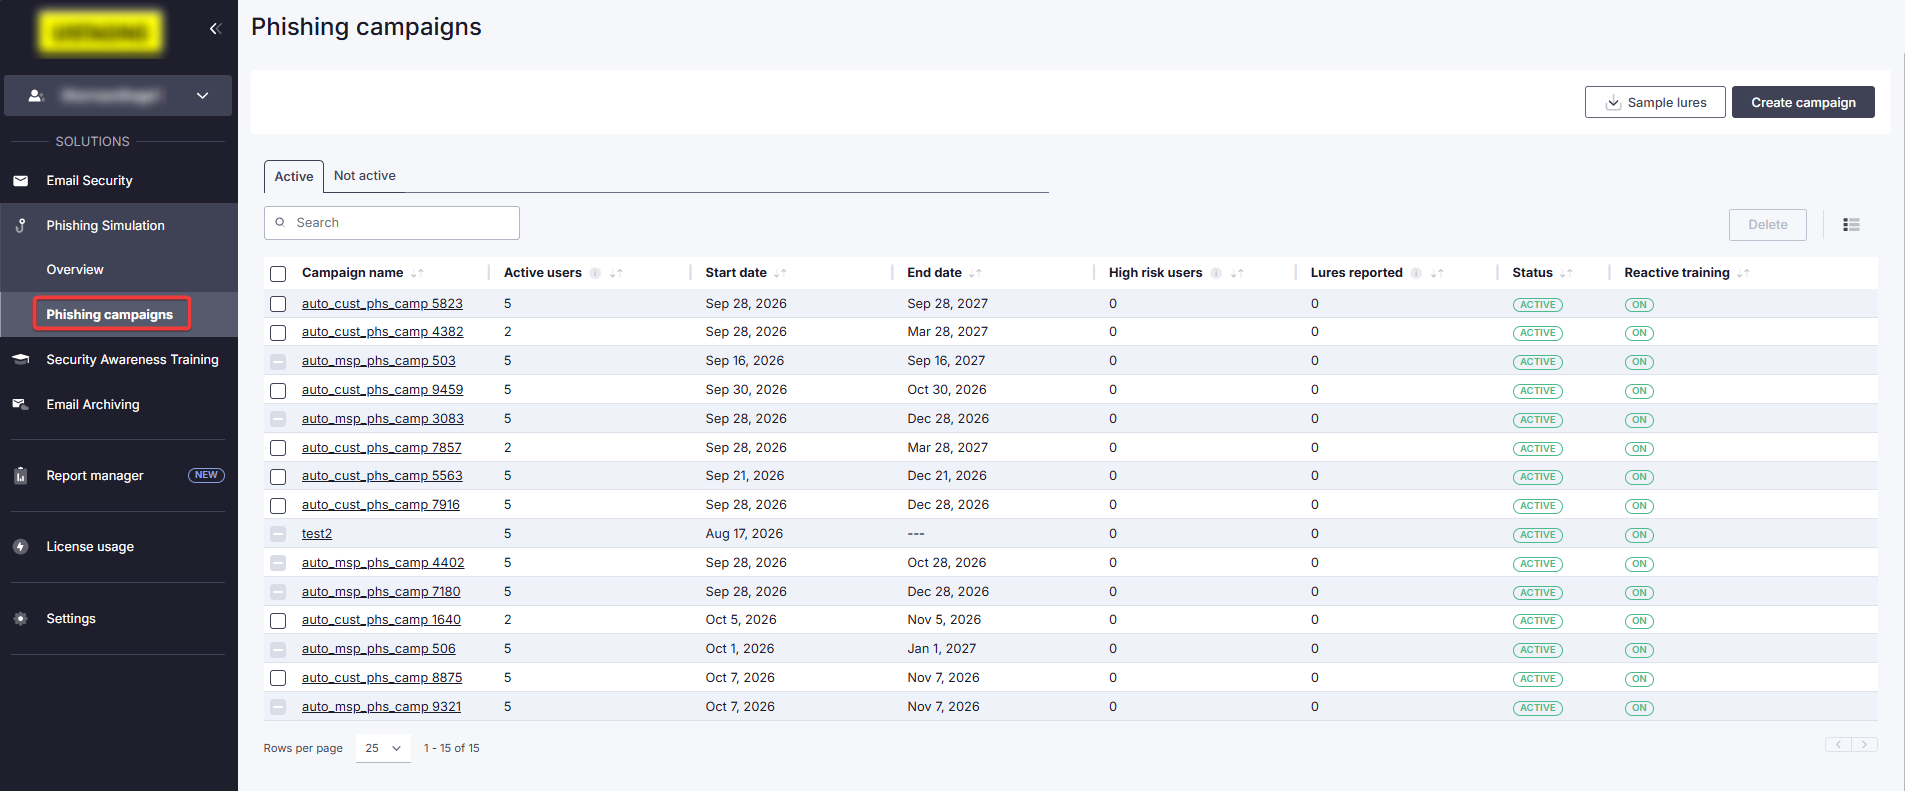
The new campaign will appear in the Phishing campaigns table. Read more in Managing Phishing Campaigns.
 1.png)